
I have for you today a short course of stamps colouring with watercolours. The technique that is shown below is the so-called “No line coloring”, i.e. painting without visible lines. This type of coloring is for everyone, the level of your painting skills is not that important. However, a bit of patience and practice is required, especially if you have never worked with watercolours before, but I assure you that it’s a very nice and relaxing doing.
Of course, you can use for this technique other media, such as alcohol markers, but I would recommend for beginners usage of watercolours, because it is very forgiving mistakes medium ;-).
. . .
Mam dla Was dzisiaj krótki kurs kolorowania akwarelami odbitek stempli. Technika, którą pokazuje poniżej, to tzw. „no line colouring”, czyli malowanie bez widocznych linii. Ten typ kolorowania jest dla każdego, nie ma znaczenia poziom Waszego warsztatu malarskiego. Wymagana jest jednak odrobina cierpliwości i wprawek, szczególnie jeśli nigdy przedtem nie pracowaliście z akwarelami, ale zapewniam Was, to bardzo fajne i relaksujące zajęcie.
Oczywiście można w tej technice użyć i inne media jak np. markery alkoholowe, ale ja polecałabym właśnie początkującym użycie akwareli, bo to bardzo wybaczające błędy i potknięcia medium ;-).
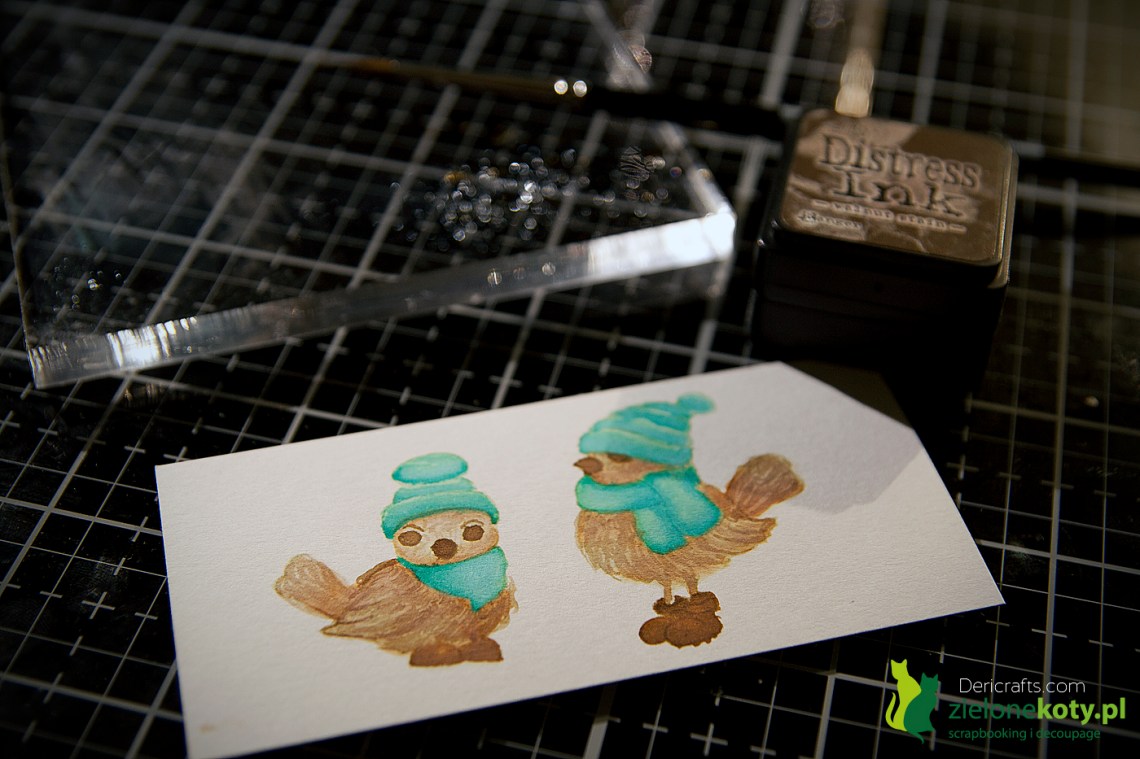
Let’s start with the preparation of tools for work. You will need watercolour paper, watercolours (I chose the Distress Ink inks), a stamp with the chosen motif (charming winter birds), a brush and water.
On watercolour paper, I stamp on birds with the brightest ink.
. . .
Zacznijmy zatem od przygotowania narzędzi do pracy. Potrzebny będzie papier akwarelowy, akwarele (ja wybrałam tusze Distress Ink), stempel z wybranym motywem (urocze zimowe ptaszki), pędzel i woda.
Na papierze akwarelowym, najjaśniejszym tuszem jaki mam stempluję ptaszki.

Then I paint the shadows with a slightly darker color of ink, but in the way to dissolve the ink on the edges of the picture. I try to blend in colours this way. Then I complement the color in places of lighter area with the same bright ink that I stamped the birds. This treatment is used wherever the bird is covered by feathers.
. . .
Następnie maluję cienie nieco ciemniejszym kolorem tuszu, ale tak żeby również rozpuścić tusz na krawędziach obrazka. Staram się w ten sposób wtopić obrys. Następnie uzupełniam kolor w miejscach rozświetleń tym samym jasnym tuszem, którym stemplowałam ptaszki. Ten zabieg stosuje wszędzie tam, gdzie ptaszka pokrywają piórka.

Then I go for painting details of birds with brown ink.
. . .
Następnie zabieram się za podmalowanie detali ptaszków tuszem w brązowym kolorze.

Now that the details dry, and the other elements are dry, I’m getting ready for the coloring of the elements of the birds’ clothes. I chose two inks for this. First I made the background in a lighter color – pistachio and even before the ink dried, I painted some areas over in a bluish hue.
. . .
Teraz gdy detale schną, a pozostałe elementy są suche, zabieram się za kolorowanie elementów ubioru. Wybrałam do tego dwa tusze. Najpierw tło wykonałam jaśniejszym kolorem – pistacjowym i zanim jeszcze tusz wysechł, domalowałam cienie w bardziej niebieskawym odcieniu.

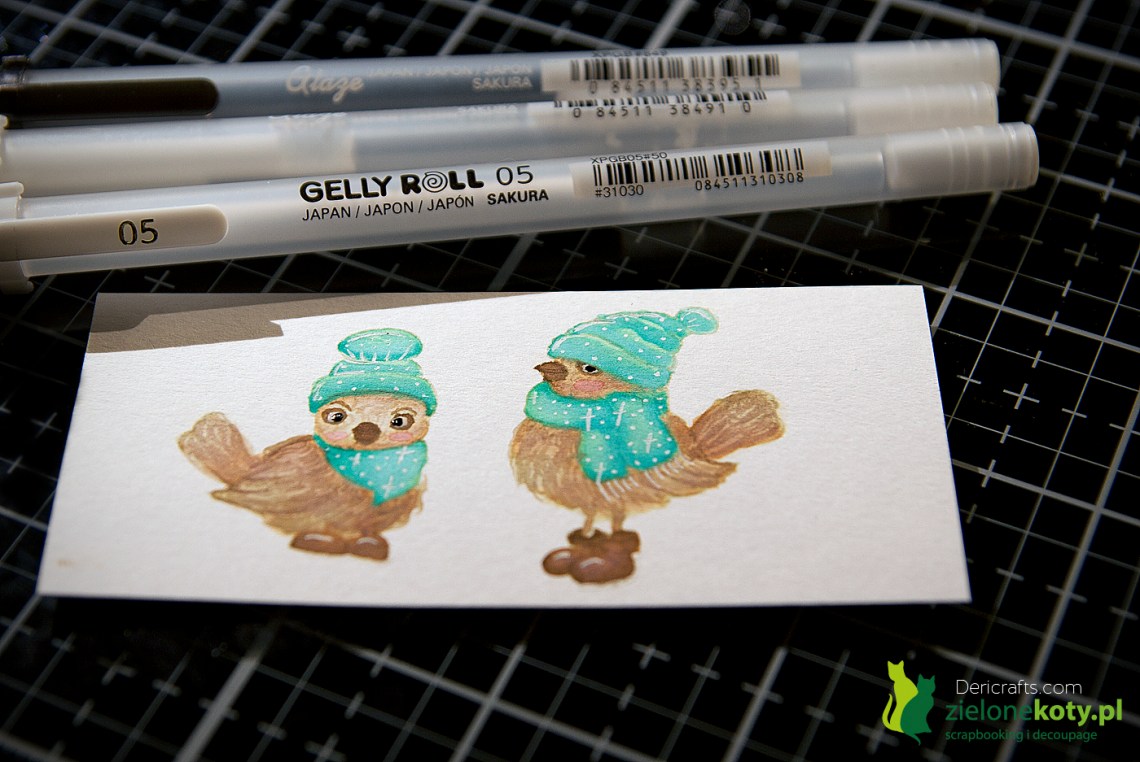
I dry the illustration and give the birds a final shape, with feather-like details painted in dark brown ink. Thanks to this treatment, the picture doesn’t look like stamped anymore 🙂
. . .
Podsuszam ilustrację i nadaje ptaszkom ostatecznego kształtu, domalowując ciemnobrązowym tuszem elementy przypominające piórka. Dzięki temu zabiegowi, obrazek nie wygląda już jak postemplowany 🙂
At the end, I draw eyes and a few embellishments on bird winter accessories.
. . .
Na koniec dorysowuję oczy oraz kilka drobiazgów do ptasich zimowych akcesoriów.
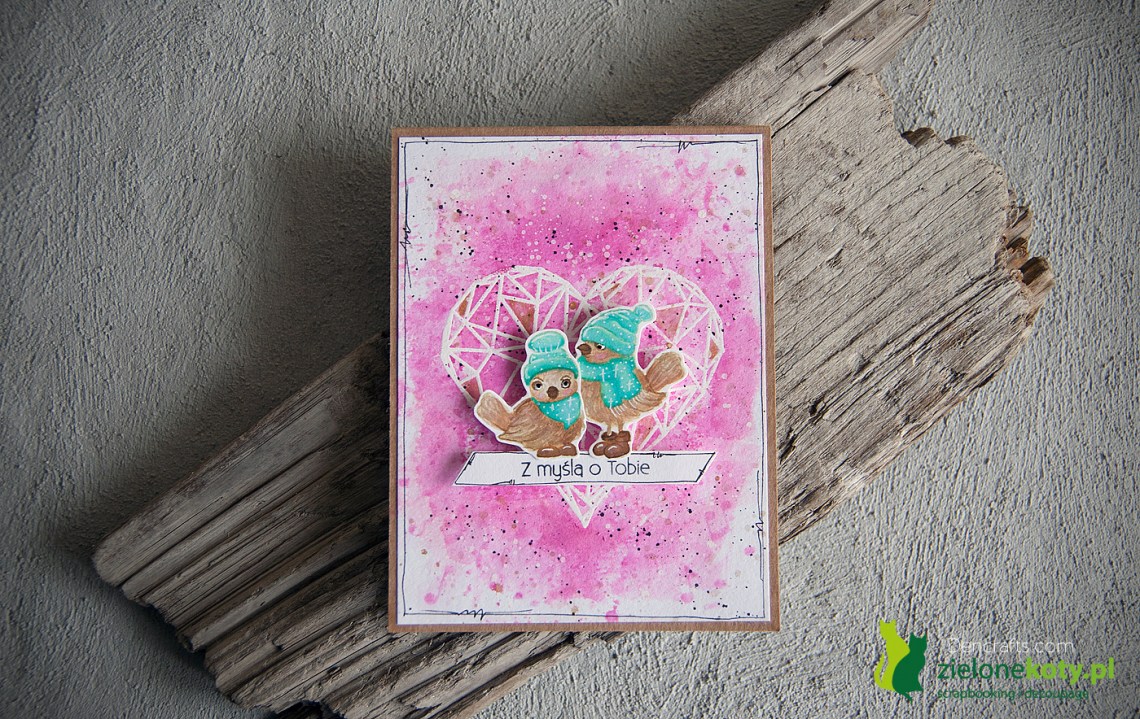
Birds, in this case the main item on the page, are ready. Therefore, I cut out the drawing and start to make a card.
I have prepared for you the inspiration of the card addressed to the younger recipient on Valentine’s Day, but it can really be for everyone and without any opportunity 😉
From the watercolour paper I cut out the base on which I made embossing with white powder. Then, using two shades of pink from the Distress inks, I coloured the background.
. . .
Ptaszki, w tym wypadku główny element na kartkę, są gotowe. Zatem należy wyciąć rysunek i zabrać się za wykonanie kartki.
Ja przygotowałam dla Was inspiracje kartki skierowaną do młodszego odbiorcy na Walentynki, ale tak naprawdę może być ona dla każdego i bez okazji również 😉
Z papieru akwarelowego wycięłam bazę, na której wykonałam embossing białym pudrem. Następnie używając dwóch odcieni różu z tuszy Distress, pokolorowałam tło.

I painted the elements of the pattern from the background with gold mist and made a few splashes for its variety. Also for this purpose I used white and black gesso.
. . .
Mgiełką w kolorze złota domalowałam elementy wzoru z tła oraz zrobiłam parę chlapnięć dla jego urozmaicenia. Również w tym celu użyłam białego i czarnego gesso.

At the end I painted a few details through the mask, I mounted the whole on the craft base, I added birds and an inscription. The card is ready!
. . .
Na koniec domalowałam przez maskę kilka detali do tła, całość zamontowałam na kraftowej bazie, dodałam ptaszki oraz napis. Kartka gotowa!


I have used:
 |
 |
 |
 |
 |
 |
 |
 |
 |
 |
 |
 |
 |
 |
 |
 |
 |
 |
 |
 |
 |
 |
 |

1 Comment